

Best Solar Charger for Backpacking: Lightweight Trail Guide

On a multi-day trail, a solar charger has to do more than produce a high output number. It must earn its place in your pack, keep working as your route changes, and connect cleanly to the devices you actually carry.
The best solar charger for backpacking balances carried weight, usable panel area, connector compatibility, and a realistic charging workflow. A compact panel can help collect energy during breaks, while a power bank can buffer changing sunlight so your phone, GPS device, or camera is not dependent on one perfect patch of sun.
That makes selection less about chasing the largest panel and more about matching the setup to your trip length, device inventory, weather exposure, and daily movement. Start by looking at what separates trail-ready charging from a general outdoor power setup, including how weight, attachment options, resilience, and variable conditions affect real use.
Explore KEUTEK's portable solar charging option
What makes the best solar charger for backpacking different?
Backpacking changes the charging problem. In a car-camping setup, you can bring a larger panel, several cables, and a separate battery without feeling every extra ounce.
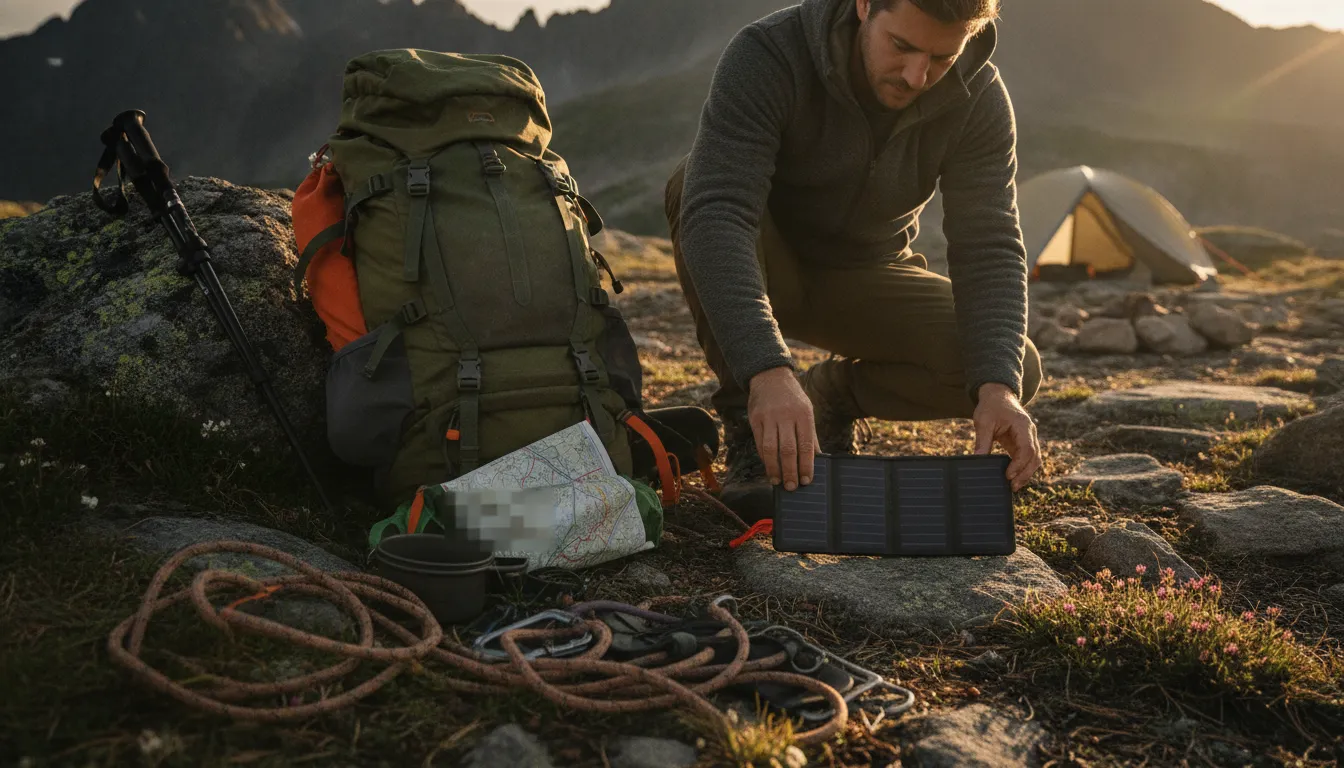
On the trail, each component must earn space in your pack. The best solar charger for backpacking balances carried weight with enough usable surface area to support your actual devices, then stays manageable when you are moving between campsites.
Weight and attachment matter as much as charging capacity
A compact charger is easier to carry, but a smaller panel may collect less energy when sunlight is limited or your devices need frequent top-ups. A larger foldable panel can provide more collection area, yet it may be awkward to secure to a pack and more exposed to abrasion. Before choosing, consider your route, trip length, phone use, GPS or camera needs, and whether you will deploy the panel during breaks or leave it positioned at camp.
Attachment points and cable routing are practical details, not accessories. The charger should sit securely without swinging against your pack, blocking access to pockets, or pulling on the connector. Keep cables short enough to manage, but long enough to place the panel where it can receive better light. A setup that is technically capable but difficult to deploy may remain packed away when you need it.
Usable output depends on how and where you charge
Backpackers rarely get a perfectly fixed, unobstructed sun angle for an entire day. Shade from trees, changing weather, body movement, and the panel's orientation can all affect collection. Directly connecting a phone to a panel may work in steady light, but changing conditions can interrupt charging. A portable battery can buffer collected energy and let you charge the phone while walking, resting, or sleeping. That panel-plus-bank workflow is often more practical than expecting a device to charge continuously in motion.
Connector compatibility should be checked before the trip. Confirm that the charger, cable, battery, phone, GPS unit, and camera accessories use compatible connections, and pack any necessary adapter before leaving. KEUTEK's solar panels can be compared with your existing setup, while the portable solar power bank may suit hikers who want collection and stored energy in one travel-ready solution. The documented 26W charging design is a product specification, not a guarantee of the same result in every trail condition.
Durability does not remove the need for realistic planning
Rugged construction helps a charger handle travel, but ports, cable joints, and battery components still need protection from rain, dirt, and pack abrasion. Use a dry bag or protected compartment when the weather turns, and avoid claiming waterproof performance unless the product documentation confirms it. Most importantly, plan around variable sunlight. Bring enough stored capacity for shaded sections, poor weather, and overnight gaps instead of treating solar charging as an unlimited power source.
How should you balance panel size, weight, and usable output?
The right setup is not necessarily the largest panel you can fit in a pack. It is the combination that gives you useful charging opportunities without becoming a burden on every hiking day. Compare the panel's carried weight and folded size with the devices you actually need to support. Then consider how often you will have clear sun and a stable place to position the charger.
| Setup | Carry weight | Usable panel area | Best use case | Main tradeoff | Trip fit |
|---|---|---|---|---|---|
| Compact charger | A compact charger is light and easy to stow in an accessible pocket. | A compact charger provides less surface area, so changing shade or angle can limit charging opportunities. | This setup suits a hiker carrying a phone and keeping power needs modest. | The lighter design trades charging capacity and positioning flexibility for portability. | It fits short trips, day hikes, and routes where a backup battery already covers most needs. |
| Mid-size foldable charger | A mid-size foldable charger adds moderate weight while remaining practical to carry on multi-day routes. | The larger folding surface offers more usable area when it can be opened toward the sun. | This setup works well for a phone, GPS device, camera, or emergency communicator used across several days. | The extra panel area requires more deliberate placement and takes up more room when folded. | It fits most multi-day backpacking trips when you need a balance of capacity and pack efficiency. |
| Larger foldable setup | A larger setup creates the greatest carrying and storage demand, especially when the trail requires frequent movement. | A larger folding surface can provide more collection area when conditions and campsite space cooperate. | This option suits heavier device loads, longer stays, or base-camp use where the charger can remain deployed. | The added size and weight can be excessive for hikers who move frequently or have only a phone to charge. | It fits extended trips and stationary camps better than fast-and-light itineraries. |
Start with your device load rather than the panel category. A phone used for navigation, photos, and communication creates a different planning problem from a phone kept in airplane mode with occasional location checks. Add a GPS unit, camera, headlamp, or satellite communicator only if you expect to recharge it during the trip. The more devices you carry, the more valuable usable panel area and a buffered portable solar power bank become.
Hiking style matters just as much. On a moving route, a compact or mid-size charger that can be secured without snagging is often more practical than a larger panel that must be laid flat at every stop. At camp, the larger option becomes easier to justify because you can choose a sunny position and leave it undisturbed. In every case, treat solar collection as condition-dependent rather than guaranteed. Choose the lightest setup that can support your devices with a reasonable backup plan for shade, clouds, or limited deployment time.
Should backpackers charge a phone directly or use a power bank?
Direct charging can make sense when you are moving through open terrain and your phone needs a quick top-up during a strong period of sun. Connect the panel to the phone, place the panel where it can collect light, and keep an eye on the connection. This approach removes one piece of gear from the charging chain, which may appeal to hikers focused on a lighter pack for a short outing.
The limitation is consistency. A backpacking panel does not collect the same amount of energy at every moment. A tree, a change in direction, a cloud, or a panel that shifts against your pack can reduce collection. If the phone is connected directly, those interruptions can cause charging to pause or restart. Frequent connection changes are also inconvenient when you are navigating, taking photos, or using the phone for emergency communication.
When does a power bank make more sense?
A power bank separates collection from use. Let the panel charge the bank during a sunny rest stop or while camp is set up. Then charge your phone from the bank when you are walking, sleeping, or under tree cover. The bank acts as a buffer for variable collection. It does not create energy or guarantee a full charge, but it gives you more control over when the stored energy reaches your devices.
This workflow is especially useful on multi-day trips. Instead of waiting for ideal sunlight every time your phone battery drops, you can collect energy when conditions are favorable and use it later. A portable solar power bank can combine those two jobs in one travel-ready unit, helping reduce the number of separate charging components you carry.
How should trip length affect the choice?
For a short day hike, direct charging may be enough if your phone begins fully charged and you only need supplemental power. Test that arrangement before leaving. Check whether your cable stays connected, whether the panel fits your pack, and whether the phone accepts power reliably when sunlight changes.
For an overnight or multi-day route, a bank usually offers a more practical margin. Start by listing every device you may recharge, such as a phone, GPS, headlamp, or camera battery. Consider how often each device will be used, when you can expose the panel to sun, and whether you have a backup charging plan. Keep the bank and cables protected from rain and abrasion, and avoid treating weather resistance as waterproofing unless the product documentation specifically supports that claim.
The best setup is the one that matches your movement and downtime. Direct charging is simple and lightweight for brief, sunny use. Panel-to-bank charging is generally easier to manage when shade, walking, camp schedules, and changing conditions make collection intermittent.
Which features matter in changing trail conditions?
Trail conditions can change faster than a charging plan. A clear morning may give way to tree cover, cloud, a different direction of travel, or a steep slope that changes the panel angle. Choose a charger that lets you adjust its position without making your setup difficult to manage, and treat solar collection as variable rather than guaranteed.
How should you handle shade, cloud, and changing angles?
When the trail enters shade, move the panel toward the brightest open area you can reach without leaving it exposed or unattended. If your route alternates between sun and forest, a power bank can collect energy during brighter breaks and charge your phone later. This buffered approach is usually more practical than keeping a phone connected directly while the available light repeatedly changes.
Cloud cover and low sun can also reduce usable collection. Place the panel so its surface faces the brightest part of the sky, then check it again after a rest stop or a change in direction. Good attachment points and a stable fold help on trail. Enough cable length also matters. It keeps the device in a protected pocket while the panel faces the brightest sky.
What protection matters in rain and abrasion?
Rain is a reason to protect the entire charging system, not an invitation to test its limits. Unless the product documentation gives a specific water-resistance rating, keep the panel, battery, ports, and cable connections sheltered. Use a dry bag or protected pack pocket when weather moves in, and dry connectors before reconnecting equipment. Keep the panel from dragging over rock, rough bark, or abrasive ground. Repeated scraping can damage surfaces and strain folding points even when the electronics still appear to work.
How can you prevent cable and connector problems?
Route the cable with a little slack, but secure the excess so it cannot catch on branches or trekking poles. Avoid sharp bends at the port, and keep connectors off wet ground. Before departure, confirm that the charger output and cable connector match your phone, GPS, camera, or battery bank. Universal compatibility is useful only when the connection is physically correct and the device accepts the available input.
For a compact trail setup, review the portable solar power bank alongside your device cables, then test the complete arrangement at home. A short dry run can reveal a loose adapter, an awkward cable route, or a pocket that does not close before those problems occur miles from the trailhead.
How do you build a solar charging setup for a multi-day trip?
A dependable trail setup starts with a realistic plan, not a promise that the sun will keep every device full. Build around your actual itinerary, the weather you may encounter, and the battery reserve you can carry comfortably. The goal is to collect useful charge when conditions allow, store it safely, and avoid making your phone or GPS your only source of navigation or emergency communication.
- Inventory every device. Write down what you will carry and what must stay available: phone, GPS unit, satellite communicator, camera, headlamp, watch, or other electronics. Note the connector each device uses and whether it can charge from a standard USB output. Separate essential devices from convenience items so a cloudy day does not force poor decisions about power.
- Estimate needs qualitatively. Consider how often you will use each device, whether you can keep it in airplane mode, and how many nights you will spend away from an outlet. A short trip with one phone may need only a battery bank. A longer route with navigation, photography, and emergency communication calls for more charging flexibility. Treat solar collection as supplemental and variable rather than as a guaranteed daily supply.
- Test the complete system at home. Connect the panel, cable, battery, and primary device before departure. Confirm that the connectors fit securely and that the battery accepts charge from the panel. Practice checking charge status without leaving ports exposed for long periods. This is also the time to identify a cable that is too short, an adapter you forgot, or a device that needs a different charging method.
- Pack the battery and cables as one system. Pair the charger with a compatible battery bank, including a portable solar power bank when its capacity and connections match your inventory. Carry the cables and any necessary adapters in a small pouch. Keep them accessible, but protect the battery and connectors from abrasion, moisture, and compression inside the pack.
- Deploy the panel when the trail allows. Place or attach the panel where it can receive the clearest practical exposure while you stop, cook, or make camp. Angle and shade can change as you move, so a panel that works well at one rest stop may perform differently later. Avoid letting the panel drag against rock or brush, and secure it so a gust or a careless step does not pull on the cable.
- Monitor and protect the setup. Check connections, battery status, and device temperature during normal breaks rather than waiting until everything is empty. Keep ports covered when they are not in use. In rain or heavy condensation, prioritize protecting the battery, cable joints, and connectors. Do not assume weather resistance means every connected component can be left exposed.
- Keep a backup plan. Start each day with essential devices charged as far as practical, conserve power through settings and usage choices, and carry enough reserve for navigation or an emergency message. If conditions remain poor, rely on the battery reserve and your offline maps, paper route information, or other non-electronic backup. A solar charger should extend your options, not replace basic trip preparation.
What should you pack with a backpacking solar charger?
A solar charger is only as useful as the small kit that connects it to the rest of your gear. Before leaving, lay out every device you expect to recharge, then pack the cables and adapters that fit those devices. Include the cable for your phone, GPS, headlamp, camera, or satellite communicator rather than assuming one connector will handle everything. Check both ends of each cable. A cable can fit the device while still using the wrong input for the charger or battery bank.
Bring a cable kit that matches your actual devices
Pack one primary cable for each essential device and one short spare for the connector most likely to fail. Short cables reduce tangles and keep loose loops from catching on pack straps. If your phone uses USB-C but another device uses a different input, add a compact adapter only when you have tested it. Labeling cables by device can save time at camp, especially when several look alike.
Keep the cables together in a small pouch instead of letting them share an exterior pocket with trekking poles, cookware, or other abrasive gear. Inspect the plugs before the trip and replace any cable with a loose connector, exposed conductor, or damaged strain relief.
Use a power bank as the buffer
A portable power bank gives you a more dependable charging workflow than connecting a phone directly to a panel all day. Sun angle, shade, cloud cover, and movement can change the available input. Let the panel replenish the bank when conditions are favorable, then charge your phone or other device from the bank while walking, resting, or sleeping. This also keeps your primary phone disconnected from a panel that may shift as you move.
Choose a bank that matches the number of devices and nights on your itinerary. For a short trip, an existing bank may be sufficient. For a longer route or heavier GPS, photo, or communication use, plan additional reserve capacity rather than assuming the solar panel will replace every watt you consume. A portable solar power bank can combine storage and collection in one travel-ready piece of gear, but confirm its ports and operating guidance before relying on it.
Protect the setup from weather and abrasion
Pack the bank, cable junctions, and spare adapters in a lightweight dry bag or sealed pouch when rain is possible. Protection from moisture is not the same as waterproofing, so follow the specific product guidance and keep exposed ports covered when they are not in use. Add two or three attachment points, such as small clips, cord loops, or compatible straps, so the panel can be secured without flapping against the pack. Use simple cable management to keep connectors off the ground and prevent tension at the ports.
Finally, carry a non-solar backup for safety. A charged power bank, spare battery where applicable, or alternate charging option can preserve navigation and emergency communication if weather blocks useful sunlight. The goal is not to carry every accessory. It is to build a compact, tested system that still works when the trail is shaded, wet, or harder than expected.
Shop a travel-ready KEUTEK solar power bank
Frequently Asked Questions
What is a good portable solar charger for backpacking?
A good option balances panel area, carried weight, connector compatibility, and a practical way to store energy. For a short trip with one phone, a compact panel or solar power bank may be enough. For several days, prioritize a setup that can replenish a separate power bank while you hike, then charge devices from the stored energy at camp.
Should I charge my phone directly from a backpacking solar panel?
Direct charging can work in steady, unobstructed sun, but output changes when the panel moves, clouds pass, or your pack enters shade. A power bank creates a buffer: the panel collects energy when conditions are favorable, while your phone, GPS, or headlamp can charge later. Test the complete panel, cable, and device combination before leaving.
How much solar power do I need for a multi-day hike?
Start with your device list and estimate daily use for your phone, navigation device, camera, headlamp, and emergency communicator. Compare that need with the power bank capacity you already carry and the hours of useful sun you expect. A larger panel can collect more energy, but its extra weight and folded size must justify the benefit for your route.
Can a solar charger handle rain and rough trail conditions?
Do not assume a charger is waterproof because it is marketed for outdoor use. Check the product documentation for its specific weather rating, and protect open ports, cable joints, and the battery from rain and abrasion. Store the system in a dry bag when conditions worsen, and deploy the panel only as directed by its care instructions.
Ready to Choose Your Trail Charging Setup?
A practical solar charging setup can help you keep essential devices powered across changing trail conditions, especially when you pair collection during daylight with stored energy for later. Explore KEUTEK's portable solar charging option to compare a travel-ready power bank for camping and off-grid planning. Review your device needs, available sunlight, and pack space, then choose the setup that fits your route and charging routine.


Leave a comment